In May 2014 we had experimented with Earth Bag construction but never got around to writing about it. A friend asking about it recently finally prompted this blog post. Hey better late.
What we built was just a small room of size 12'x8'. So why earth-bag? Because it is a good diy method for the beginner, has a low energy footprint and the thick walls that it creates looked quite nice in the pictures we had seen. We had soil for construction purposes from the pond that we had excavated earlier. We bought used polypropylene cement bags (15"x18") at Rs. 2/3 per bag. Barbed wire was the only material that we really paid for. We didn't have any mason. We hired 2 men and 2 women for about 3 weeks. The team took about a week to learn the process and then the pace improved.
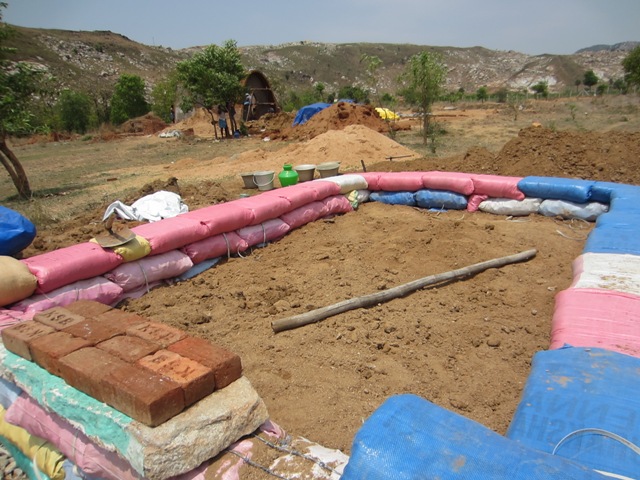 |
| After a foundation of loose gravel, the earth bag courses are laid. |
 |
| The bags are filled right where they are placed. The blue bag that is being filled here is sitting on top of a metal plate (slider) that is pulled out once the bag is placed. The slider prevents the bag getting caught in the barbed wire below when the bag is adjusted |
 |
| Light tamping after every 1/3rd of the bag is filled. |
 |
| Checking the new course with a tube level |

 |
| Around the door-way |
 |
| The coil of barbed wire is placed on stones in this fashion for ease of use. |
 |
| Back filling with urbanite (Ramgopal & Dev) |
 |
| Siddharth, Dev, Prabha and Rampgopal |
 |
| Bricks weigh down the two strands of barbed wire in-between courses |
 |
| The bag next to an opening is filled first, followed by the adjacent ones. |
 |
| Opening for a window. Bricks to be removed later after construction. |
 |
| Tamping a newly laid course. |
 |
| The gap in between the layers have to be filled before plastering can start. |
 |
| Although mud plastering made it beautiful, we later realized that it should have been done only on the inside walls. A cement stucco on the outside would have survived the driving rains better. |
 |
| We decided to switch to cob after the Earth Bag walls were 5' tall. Dev is attempting to decorate the cob wall. |
 |
| And this is how it looks now. We love our Earth Bag room! We use it as our tool shed and resting space. |
 |
| Cob decoration. |
We wanted a traditional roof (with palm rafters and country tiles) on this room. But the carpenters that put up that roof were not quite comptetant. Once the wooden framework was loaded with tiles, the sleepers resting on the walls shifted and the roof got lopsided. This happened not just once; it happened two times in a row! We felt totally disheartened and shelved the project for several months. Later we got steel trusses made and used GI sheets on it. The trusses rest on pillars that are outside the building. We covered the sheets with some tiles. We salvaged all the wood we could from the collapsed roof. The windows and door are made of the salvaged slats.
We love the deep walls (18" thick) and the insulation that this provides. Even on a very hot afternoon (110 F) I have rested in here with no fan! And it was quite comfortable.This building experience and the failures that we have had in the process have been very valuable.
-- Hema
Enjoyed the read. Looking forward to visit the place and learn valuable life skills from both of you.
ReplyDeleteHats off.
ReplyDelete-landed to channai from US.
-So hot there
- settled at farm n working with new ideas.
looks cool :)
ReplyDelete